How to Pick a Kona Dive Site Before You Hit the Water

How to Pick a Kona Dive Site Before You Hit the Water
A quick confession
I make my first choice based on current direction, not your Instagram photo.
A gorgeous reef selfie tells you almost nothing about whether the site is safe for your team at your exact hour.
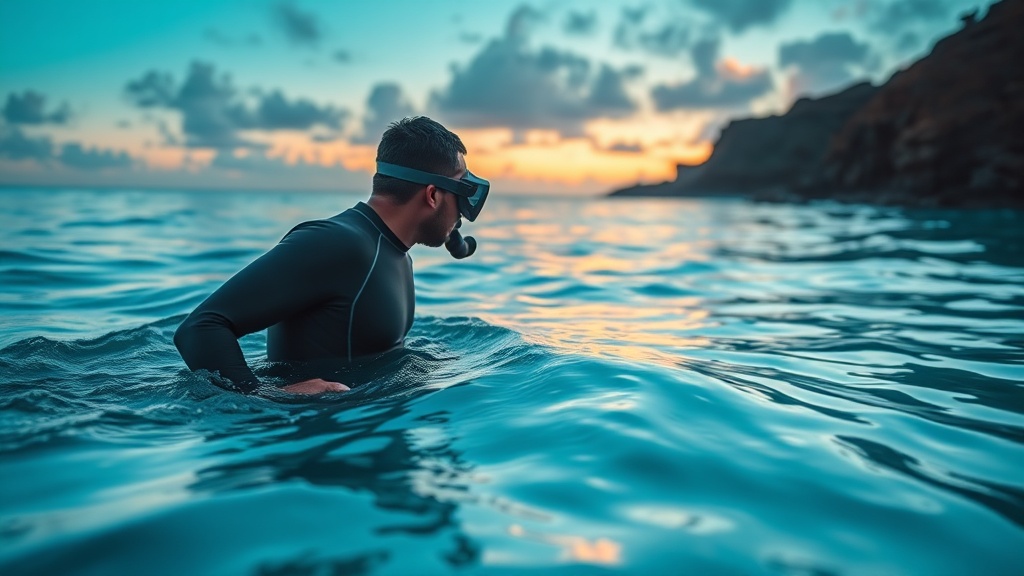
Freediving in Kona is usually calm, but only if the day stays honest. My job as a safety diver is to read the day before I even think about depth.
The first filter: current is the real boss
Before I decide if a site is even possible, I check three things:
- Current direction at the swim line (not just offshore reports)
- How a drift pattern would change your exit
- Whether wind and swell are going to stack into a chop at your entry
If wind and current push the same direction as the drift, visibility can look clear yet your recovery gets expensive.
If they oppose each other, you may get clean visibility but a messy surface plan.
I don't care how pretty a place looks until this is solved.
My rule is simple: if my buddy team cannot guarantee a calm, short, low-surface-load exit, I don't dive.
The second filter: entry geometry, not just access points
Most people talk about "shore entry" like it is one thing.
It is not.
A dive site is a system with three gates:
- Entry gate: what happens when your fins touch first water.
- Descent gate: whether the profile supports your intended depth without forcing panic in the first fifty seconds.
- Exit gate: how quickly you can regain control when the bellows tells you it is time to come up.
If only one of these is weak, the site goes into my no-dive list.
I reject any entry that gives me:
- an unstable launch with hidden drop-offs under the first two steps,
- loose kelp fields directly in front of the swim line,
- or a shallow lip where two strong swimmers can get separated without warning.
These are the same places where the first emergency almost always begins: not at 20 meters, but at the edge.
The third filter: depth gradient and room to breathe
You can save a site if you understand three words: slope, shelf, and reset.
I want a gentle enough slope to establish a clean descent rhythm.
I want a clear shelf to pause at your first turn if air economy shifts.
I want room overhead to reset if CO2 spikes at depth.
If the reef drops from waist-deep to hard wall in a short burst, you may have an Instagram moment and a bad coaching conversation later.
Dry-land reading of a topo map can't replace looking over the reef from the boat, but it can prevent you from stepping into a geometry problem you can't solve with breath-hold discipline.
The fourth filter: bailout psychology, not gear fantasy
I hear people say, "But I can swim that far," and I ask, "Can you be wrong in the same way twice?"
If a site has a hard return path and one strong current line, your rescue margin shrinks fast. Carbon fiber fins and expensive gear do not expand your margin.
I look for:
- Two independent exit options (even if one is only a long glide)
- One predictable fallback buddy station
- One place to wait where you are not out of your own line of sight
The goal is not to make your dive easier. The goal is to make your mistakes survivable.
A ten-minute on-site recon I refuse to skip
This is the part most people skip when the site is "obviously fine."
I still do it every time.
- Walk the path with a watch and no phone. If I can’t keep footing calm while looking at terrain and tide direction at once, I don’t trust the crew for deep work.
- Check the waterline for wash, debris, and unusual turbulence.
- Enter once in neutral, slow pace and note your first-minute buoyancy profile.
- Surface and walk to an alternate safe point to test if the wind can still move across the waterline after the first few strokes.
- Confirm hand signals and ascent cadence with the team again.
If any one point is uncertain, I adjust my plan or change the site.
The schedule before the site
People think planning starts when the wetsuit is on.
No. Planning starts with the evening before.
For Kona, I keep a small notebook with three fixed checks:
- Current window: does the predicted line move when the tide changes?
- Moon and light: are we stacking an unnecessarily long dark edge into the dive window?
- Traffic and access: is the entry area now a social event from sunrise to mid-morning?
If traffic pushes your entry toward peak crowd flow, I reduce depth targets.
I’d rather get an honest 12-meter session than a rushed 20-meter session that turns into a rescue drill.
What makes a good site feel safe
A good Kona site is not silent and glassy all the time.
A good site is one where variables are legible, where every diver understands the plan, and where you have space to think before a problem becomes a chain.
If I can explain the plan in one breath and everyone can repeat it back in one breath, the site is likely a workable one.
If they need a long briefing to understand why we enter from the left and exit from the right, you're already carrying too much cognitive load before the first descent.
My short list for tonight
When someone asks me for a first recommendation this week, I give one of these two families:
- Wide, low-gradient reef margins for teams building consistency.
- Clean mid-slope breaks for experienced breath-control days.
Everything else waits for another day or another tide.
The bottom line
A dive site is not a destination. It is a permission slip.
You earn permission by checking current, geometry, and exit logic before your first stroke.
That sounds boring. It is the only interesting part if you actually want to keep returning to depth.
Breathe easy, dive safe.